Delete scheduled push notifications
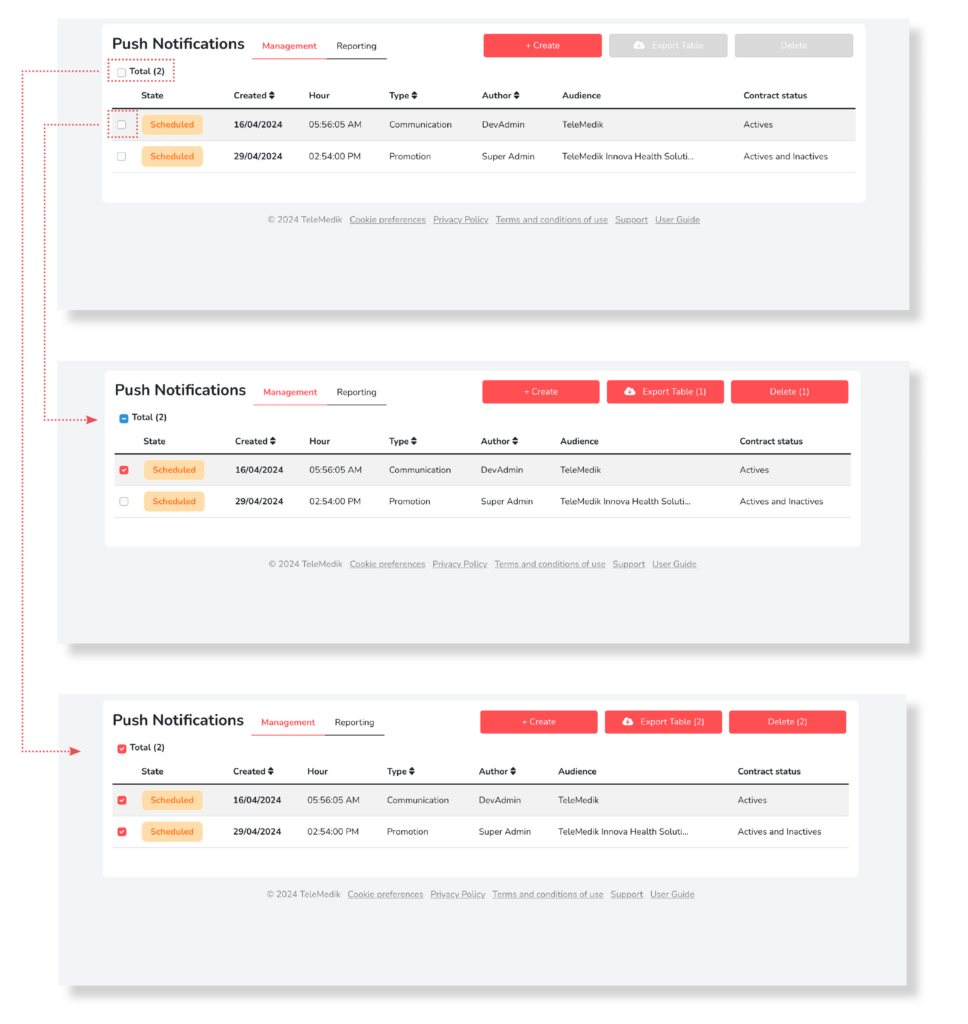
The process for deleting scheduled Push Notifications is simple. Access the Management list and select the notification(s) you want to delete. To select them you can do so: one by one in the selection box or simply by selecting the total box and it will automatically select all the notifications in the list.

After you have selected all the notifications you are interested in deleting, press the Delete button.

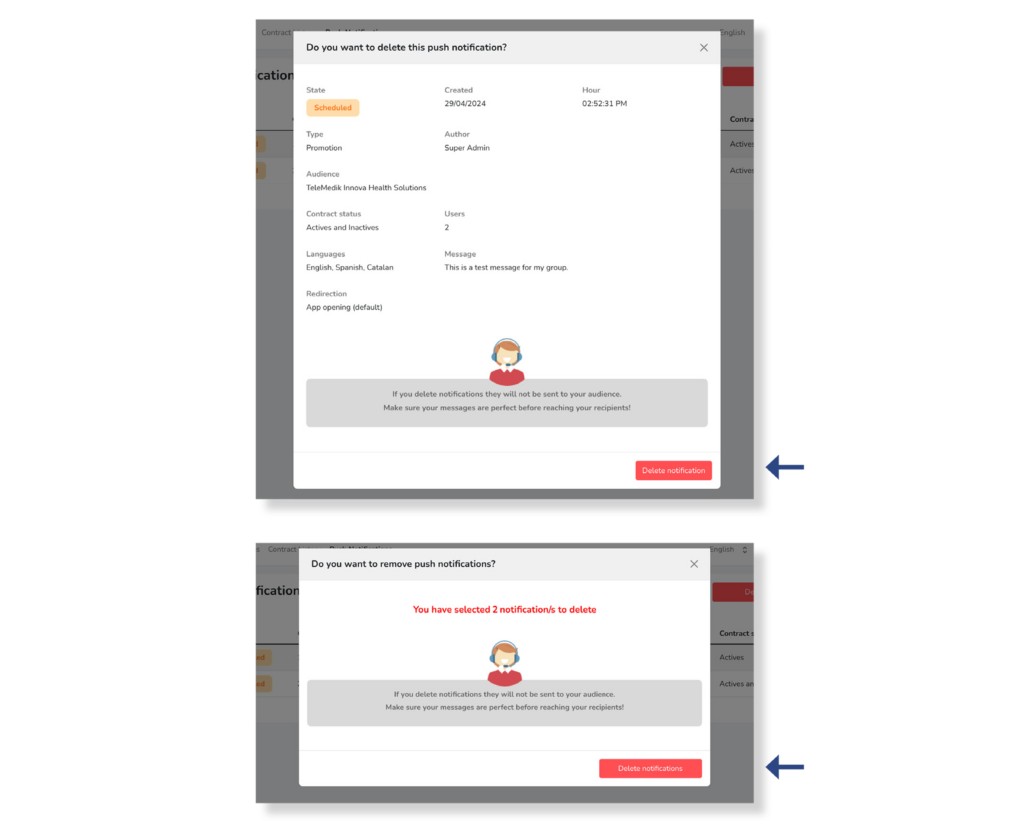
Once you have pressed the Delete button, you will be presented with a confirmation screen that varies depending on the selection made. If you have chosen to delete only one notification, a screen will be displayed with all the information for that notification. If you decide to confirm that you want to delete it, you will need to press the Delete notification button.
In case you have selected more than one notification to delete, a screen will be displayed telling you the number of notifications to be deleted. To confirm the deletion, you will need to press the Delete Notifications button.

After pressing the Delete notification button or Delete notifications instead, the screen will close and you will observe how the line(s) you have selected disappear from the list of notifications.


