Schedule a push notification
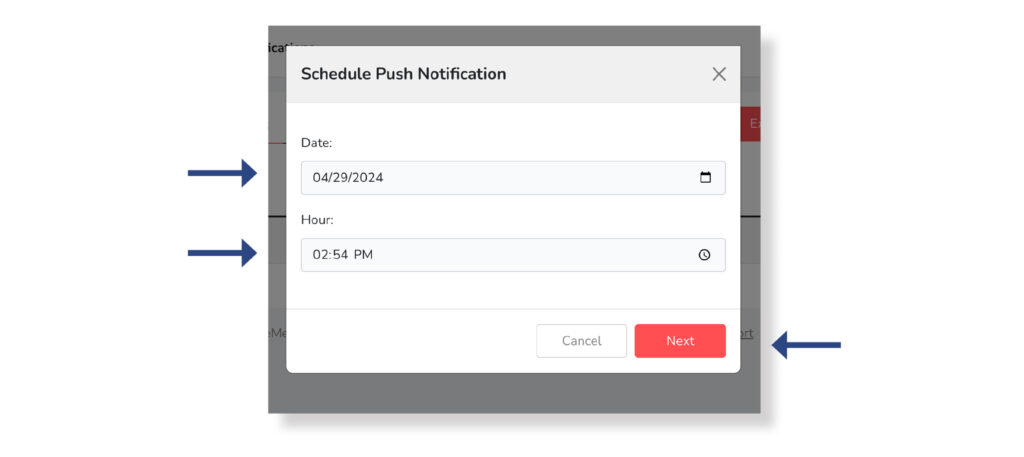
After completing all the Push Notification Creation sections and selecting the Schedule action, you will be taken to the scheduling screen.
Which will allow you to schedule the send date and time. Make sure the scheduled time is at least five minutes later than the current scheduling date and time. Once you have completed the fields, press the Next button.

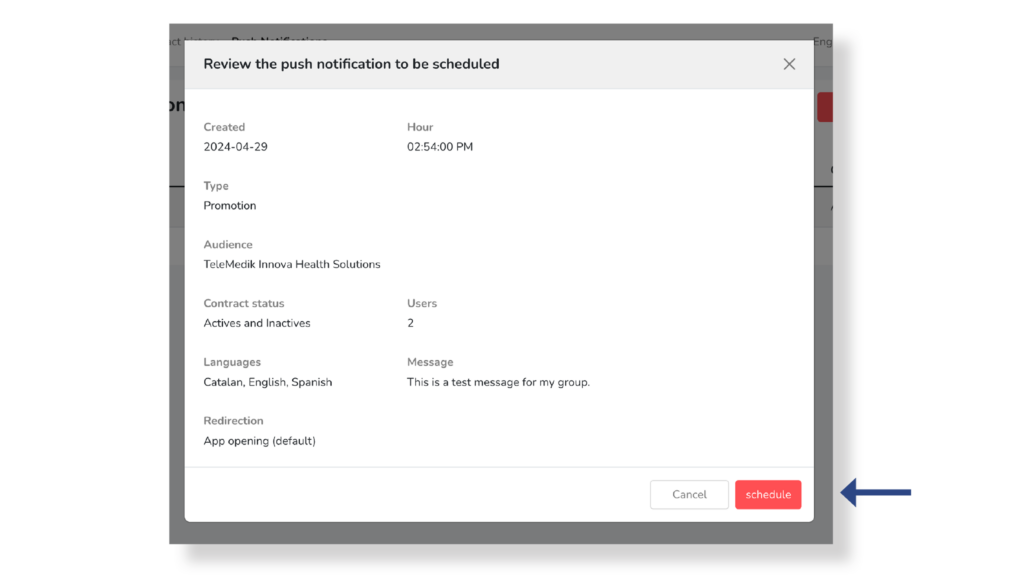
In the next view, ensure that all the data entered is correct. In case any information is incorrect, select the Cancel button and change the necessary information. If, on the other hand, all the data is correct, proceed by pressing the Shedule button.

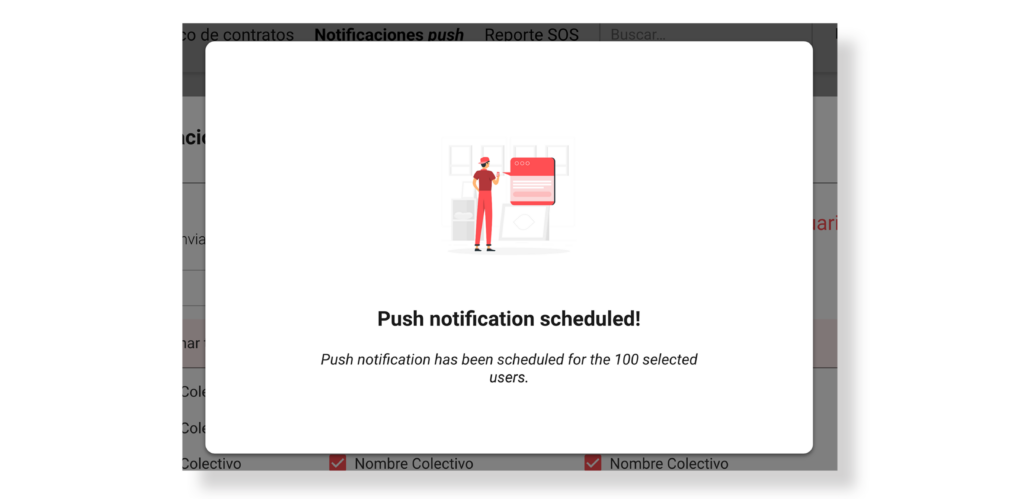
Once sent, a verification screen will be displayed for a few seconds, then you can view the scheduled sending in the Scheduled Notification Management Area.


