Create a collective
You must first access the collective section.
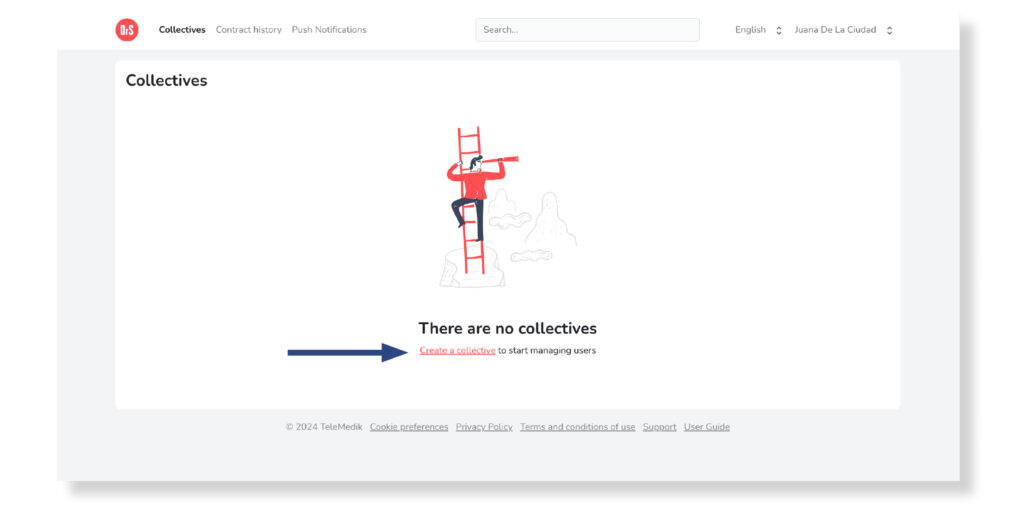
a) If there are no associated groups collective
You must select the text Create a collective that appears on the screen:

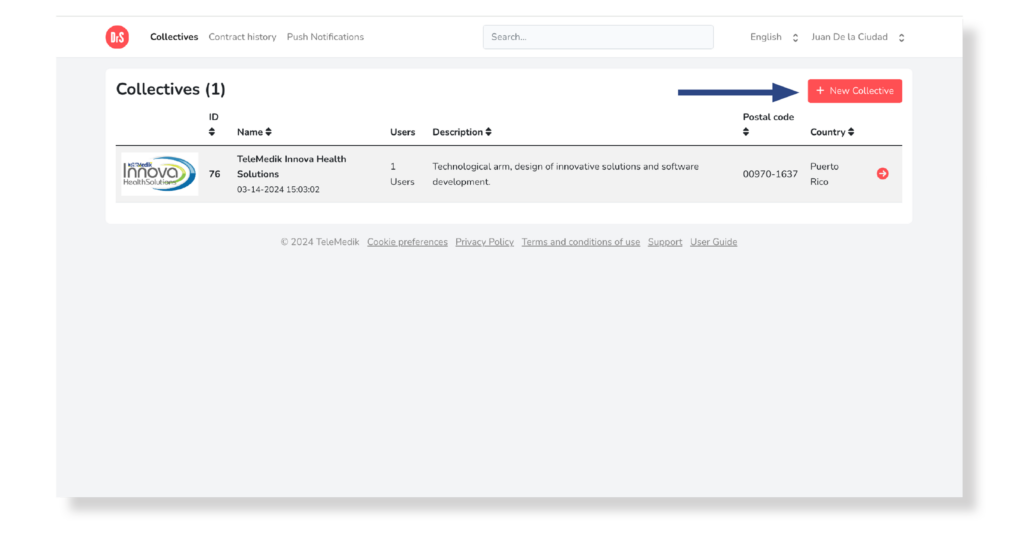
a) If there are associated groups
Select the New Collective button located at the top left of the list of groups:

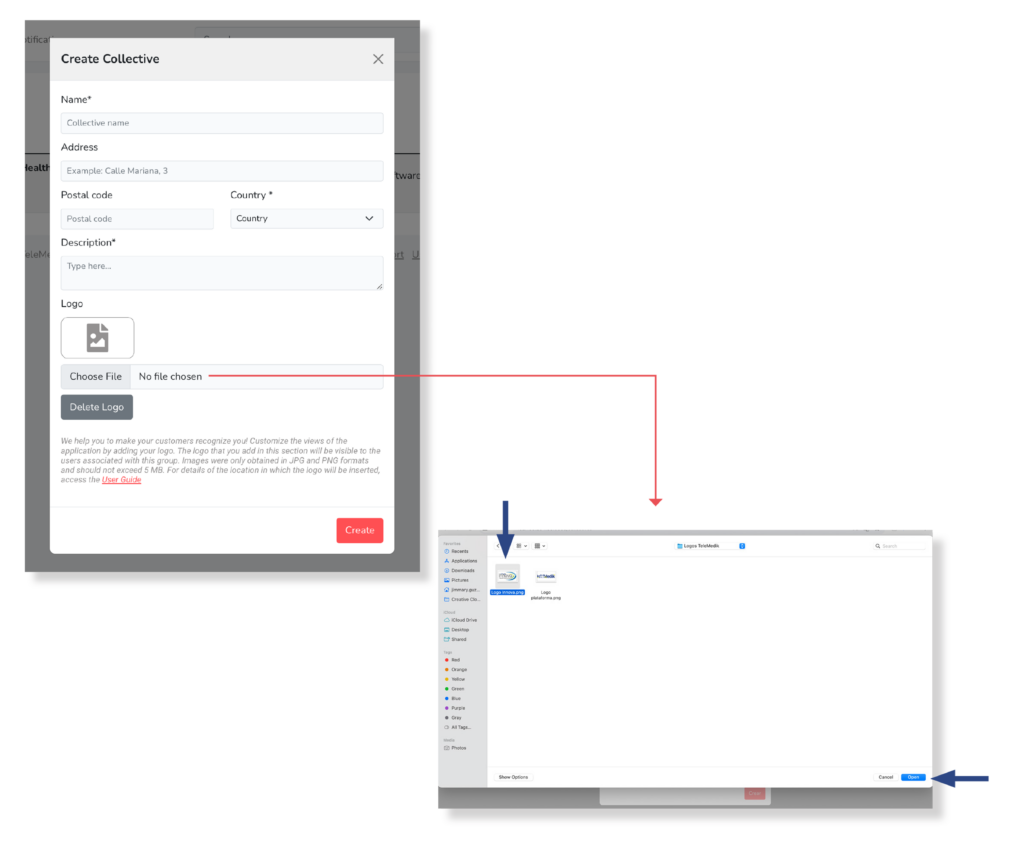
You will be directed to the next screen where you must complete the fields. Those marked with an asterisk are mandatory to complete the collective creation process:
- Name*: Speci y the name you want to give to the group (for example, it can be your Client’s name).
- Address: Postal address associated with the group.
- Postal Code: Postal code associated with the group.
- Country*: The population associated with the collective and the “geographic limit” within which the user will hold a contract. Once created, it cannot be edited. If service is required in more than one country, a multi-collective contract must be created
- Description*: Information that defines the group.
- Logo: Pressing it will open a window where you can choose the logo file you want to upload. Select the file and press the Open button. If you want to cancel the upload, press the Delete Logo button.
- Choose file: Space where the uploaded file name is displayed.
Finally select the Create button. You will see the group created in the list of groups in the collective section.


